For my nephew’s project at school, they’re to make a Christmas lantern and one of the designs that my sister thought is to put origami lucky stars. But she doesn’t know how to do it, so I helped and taught her how. Today, I’ll be sharing the steps here for you to try too (if you don’t know yet how to make one). Enjoy! 🙂
What you’ll need:
Colored papers, scissors, ruler and pencil.
Make strips out of the papers. I used 11 inches long and ½ inch wide.
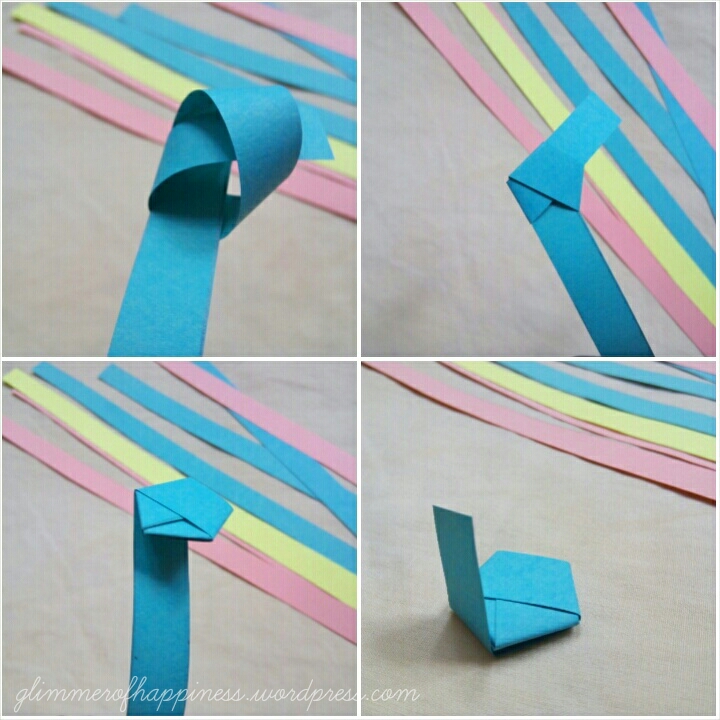
Make a knot near one end of the strip like the one in the first photo. Next, flatten the knot and tuck the loose end into the back of the knot. Then start wrapping the long end around the star. Lastly, tuck the loose end into the star.
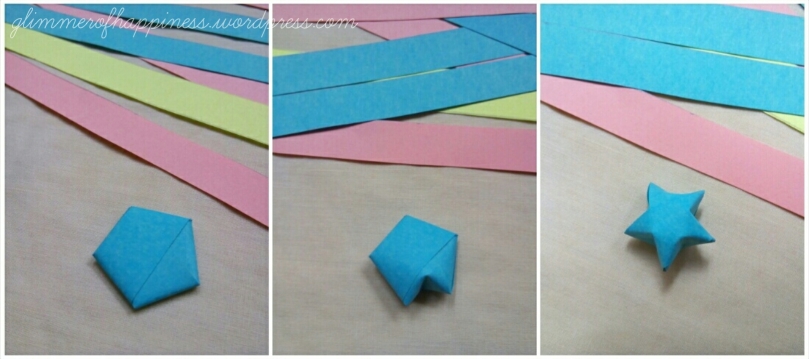
First photo below is what it looks like if the wrapping is completed. Next step (which is my favorite part) is inflating the star. Press carefully inward on four of the 5 edges, and then it will begin to inflate. Third photo is your completed origami lucky star.
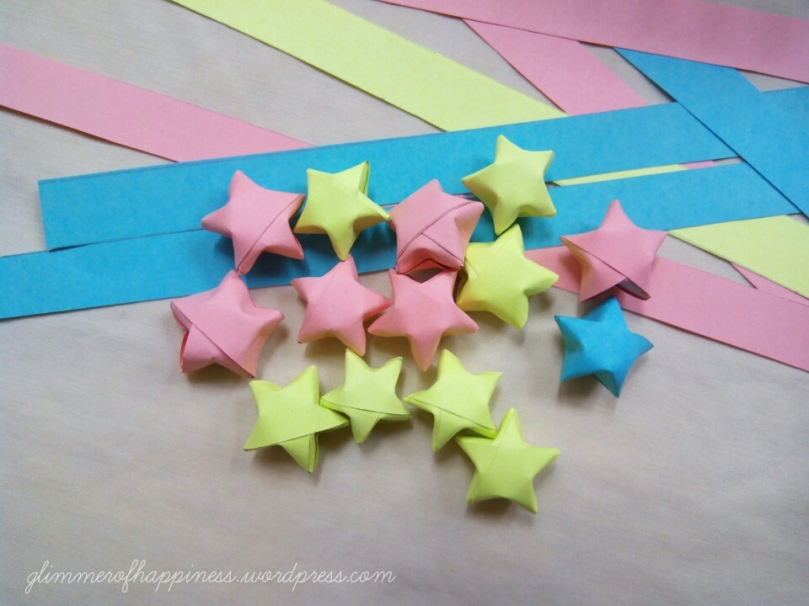
I hope my instructions were helpful. 😀 Enjoy making these, guys! 🙂 You can put them in a clean jar after.


Omg I was about to start making these. I want to fill a jar. I used to have some lucky stars lying around but I lost them. 😦
LikeLike
It’s time to make some again! ^__^
LikeLiked by 1 person
Pinterest perfect my love, You’ll have to show me soon 🙂
LikeLike
I’ll teach you. Haha
LikeLiked by 1 person
Hooray!! 🙂
LikeLike
I love making these 🙂 I have a star shaped jar for them too; they’re adorable!
LikeLike
Yup! They’re really cute to look at. ^__^
LikeLiked by 1 person
I used to see girls making these ALL the time. The Asian stores here actually sell pre-cut strips of fancy paper just for this purpose! I didn’t know it was so easy – the main trick is the beginning part it seems. Thanks for sharing!
LikeLike
Yah, I have bought before those strips with different designs haha! They’re so cuuute.
LikeLiked by 1 person
I used to make these all the tiiiime. Omg the memories! Great post.
LikeLike
Yah! I Think i was in 4th grade when I learned this. I’m glad I was able to teach my nephew this too. Thank you!! 🙂
LikeLike
How cute are these. Going to have a go at making them with the kids
LikeLike
I hope you all will have fun 🤗
LikeLiked by 1 person